
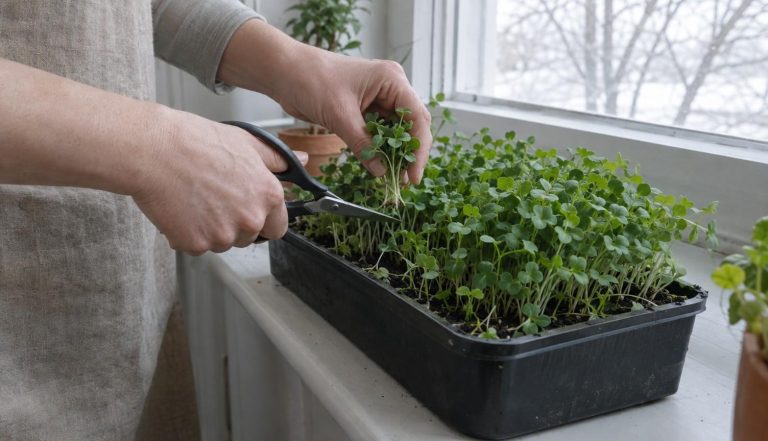
Microgreens are ready to cut about 10 to 14 days after sowing.
That is the range Illinois Extension, the University of Illinois’ public outreach service, gives in two of its blog posts. Its growing handout says 1 to 3 weeks, depending on how big you want the greens.
Either way, a tray sown this week can be on your plate in two to three weeks. It needs a shallow container, seeds, potting mix and a bright window.
Pick seeds, a tray and a mix
Many vegetables work as microgreens. The list from Austin Little, an Illinois Extension horticulture educator, includes mustard, kale, endive, arugula, beets, radish, watercress, peas, cabbage, basil and most kinds of lettuce.
Radish, broccoli, kale and cress belong to the brassica (broccoli) family. An Illinois Extension blog post says they taste like the full-size plants, only slightly more delicate.
Skip tomatoes, eggplants and peppers. Little says plants in the nightshade family should not be grown as microgreens, because their stems and foliage contain toxins.
Choose seeds that sprout well and have not been treated with chemicals or coatings, the same blog post advises.
For the container, Illinois Extension describes it this way:
- A shallow tray with drainage holes. A plastic tray, a pie tin or a takeout container works if you add holes. A handout by Zack Grant, an Illinois Extension small farm educator, gives the depth. A depth of 1 to 2 inches is ideal if you want to save on potting mix.
- A second container underneath. Grant adds one without holes, to catch the water that drains out.
A basic potting mix is the easiest growing medium, according to Grant’s handout. The blog post says to fill the tray with an inch or two of moistened mix. Little’s news release says about 2 inches.
Illinois Extension pitches microgreens as a winter project for indoor gardeners, one more way of tending plants indoors through winter.
Sow thickly
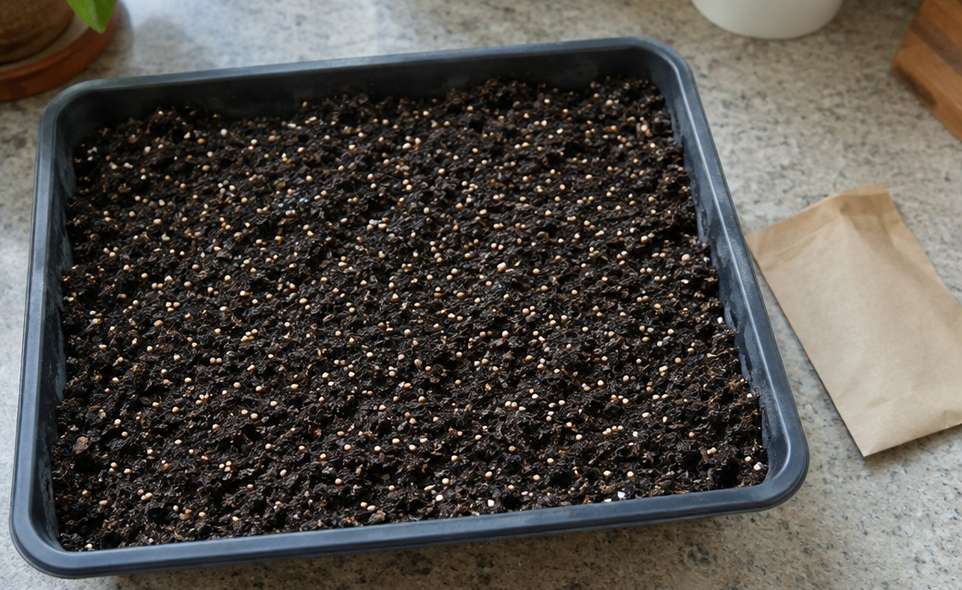
Microgreens are cut while the shoots are still young, so the seed goes down close together. Little puts the spacing at about ¼ inch apart, or less.
Grant gives amounts by seed size:
- Large seeds such as radish: 6 to 8 seeds per square inch, or 2 to 2.5 tablespoons on a standard 10 by 20 inch flat.
- Small to medium seeds such as brassica mixes: 0.5 to 1 tablespoon per flat. For small seeds, about 10 to 12 per square inch.
Use a lower seed density if you plan to grow on to the first true leaf stage. At that stage the leaves look like the ones the full-size plant will have, Grant says.
Level the mix and tamp it lightly with a flat object, leaving about a half inch below the rim. Scatter the seed evenly, with attention to the edges. Then mist the seed and mix until evenly moist, not wet.
There are two ways to cover the seed. The blog post and the news release put a thin layer of mix over it.
Grant warns that mix on top sticks to the leaves and makes a mess. He uses a moistened paper towel or a humidity dome instead.
The first two weeks, in order
Here is the sequence, using the 10 to 14 day range:
- Day 1: sow, mist and cover. The blog post says to cover the tray with a clear lid or plastic wrap. Grant says the lid raises humidity and helps the seeds sprout.
- Every day until they sprout: look. Keep the mix moist, never soaked. Under a paper towel, lift a corner gently to check. Roots that reach the soil push the towel up.
- When the towel lifts: uncover. Take off the towel and the lid. Grant says not to worry if you pull a few seedlings out, since most are well established.
- After that: mist once or twice a day. The blog post says to do it as needed.
- Days 10 to 14: cut at the first true leaves. The blog post says they are ready once the first set of true leaves has formed.
Light, warmth and watering from below
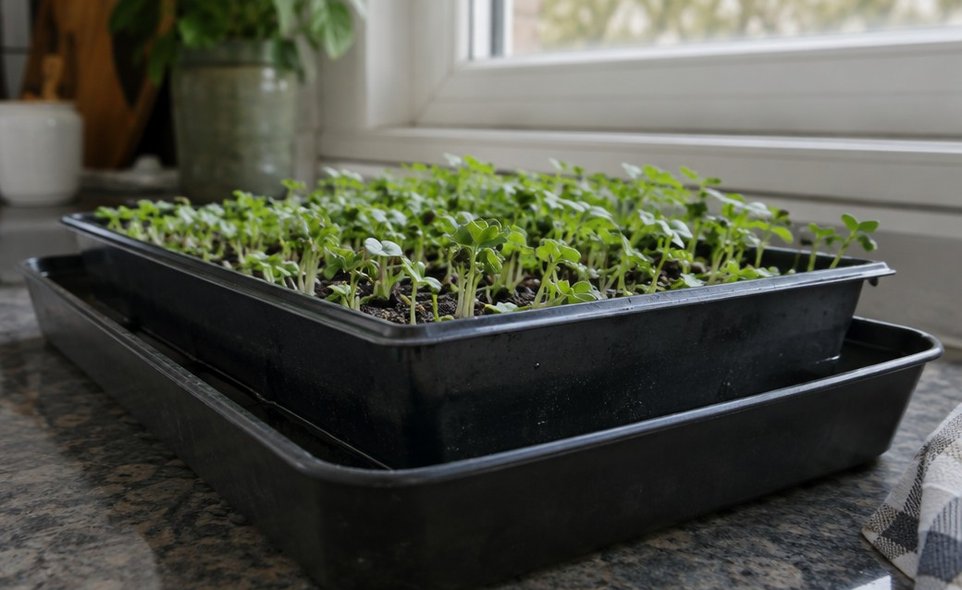
Little says microgreens need about six to eight hours of light a day for best growth. A sunny, south-facing window is preferred, with LED grow lights as the alternative.
The blog post gives a lower figure: at least 4 hours of light a day. If the seedlings grow leggy, it suggests adding a grow light.
Herbs can share the same sill, in a windowsill pot or a countertop herb kit.
Turn the tray as the seedlings lean toward the light, Grant says, so all sides grow evenly.
Warmth has two figures:
- Sprouting: Grant gives an ideal soil temperature of around 75°F. A lidded tray in a sunny window at room temperature should do the trick, he says, and a heat mat is optional.
- Growing: Little says microgreens grow best around 70°F. They tolerate down to 50°F, with slower growth.
Check the tray daily. Spray it once or twice a day, or water from below. Little describes standing the container in a tray with a shallow layer of water, which it slowly takes up over several days.
Grant calls bottom watering the best way to keep microgreens dry and less open to disease.
His other rule is not to overwater. If the mix is evenly moist, wait until it starts to dry, which shows first around the outer edge.
Cutting, washing and storing
For the cut, the sources give three versions:
- Grant: use a knife or scissors and cut about ¼ to ½ inch above the soil line, holding a bunch of leaves in one hand. He says this is best done by an adult.
- The blog post: use kitchen shears and cut at soil level.
- Little: cut at the base with sharp scissors, or take up the whole plant with its roots.
Wash them well. Little says to submerge the greens in cold water and rinse thoroughly. Grant adds that this removes seed coats and leftover soil, and suggests a colander or salad spinner.
Eat them the same day, or bag them and keep them in the refrigerator for up to a week, the blog post says. Little says you can cut the whole tray at once or harvest as needed.
Sprouts are not microgreens
The two are easy to mix up.
An Illinois Extension blog post explains that sprouts are germinated seeds, often grown in the dark, and the entire seedling is eaten. With microgreens, only the tops are eaten.
A 2015 Illinois Extension blog post by a horticulturist says microgreens are safer to grow than sprouts.
Its reason is that they are harvested when the sprout risks are not present. They also grow in soil and sunlight, rather than from seeds rinsed in water.
The post says that from the 2000s, raw sprouts became known as a risk for food-borne illnesses like salmonella and E. coli. It also says many past sprout contaminations can be linked to seed sources or poor sterilization.
The post still advises good growing practices: seeds from a reputable company, and pots sterilized with a 10 percent bleach solution.
After the first cut
Once a tray is completely cut, Grant’s handout says to compost the remaining stems and soil.
It adds that repeating the whole process every week gives a continuous supply, so start the next tray the same way.